
Pokemon GO is the most popular app for both iOS as well as Android. If you’re living in a big city then you’ll probably see dozens of people wandering the streets looking at their phones and congregating around certain areas. If you want to join the craze you’ll want to read this complete beginner’s guide because there is no tutorial when you start the game and the game functions are rather vague. You’ll have a huge advantage over other beginners and be well on your way to being a pokemon master.
STARTER POKEMON:
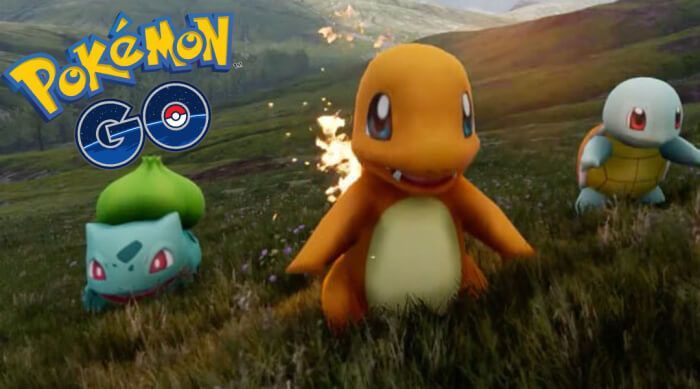
When you start the game you’ll start by choosing a starter pokemon. You can choose Pikachu even though it’s not initially shown. Of course, the original three starters of Charmander, Bulbasaur, and Squirtle are available and if you don’t see them then just wait until they reveal themselves, it might take a few seconds. If you fancy a lovable Pikachu instead of the three starters then you have to physically run away from the original three starters. When you do the three starters will pop up again. Do this until a Pikachu reveals itself, it might take a few tries. Catching a Pikachu early on is a good idea because there are very few electric-type pokemon in the game since Pokemon GO is based on the original 150 pokemon. Many trainers will probably have a water or flying type guarding their gyms because they’re so plentiful early in the game, so you’ll have a bigger advantage.
CATCHING POKEMON:
You’ll start walking around and eventually get a notification that there is a pokemon nearby, usually through the vibrate function. A little icon of the pokemon will appear and you tap on it. If you’re in AR (augmented reality) mode then you’ll see a cute pokemon on your camera superimposed on what you see in real life. For beginners I recommend turning AR mode OFF. That automatically centers the pokemon in the middle of your screen so you don’t have to do it yourself which makes it easier to aim for them. When you hold your finger on the screen the circle around the pokemon begins to shrink. The smaller the circle the easier it is to catch so wait until it’s at its smallest point. That ring also signifies difficulty of capture. Green means relatively easy, yellow is a little tougher, orange and red are the most difficult and usually means the pokemon is either very rare or at a high CP (combat power) which is the equivalent of levels in the game. The actual throw is important too; get the distance and direction right to catch the pokemon, it might take some practice but find a way that works for you, it’ll be difficult to ever be low on pokeballs so go for it. As you progress, occasionally your ball will shine and curve making you miss. That pokemon isn’t magical, that’s what the game calls a curve ball making it a bit more difficult but if you do manage to catch that pokemon with a curve ball then you’ll get extra XP.
FINDING POKEMON:
On the lower right hand corner of your screen you’ll see some pokemon icons or silhouettes and some footprints. This is Pokemon GO’s very vague system of letting you know what pokemon are around you. If you tap on it it’ll open a mini-menu and you’ll see a bunch of pokemon that are within probably a kilometer range. The footprints indicate how far they are from you. If there are none then that means they’re within your immediate vicinity and walking a few feet will probably make it pop up. Three steps means they’re fairly far. To get to a specific pokemon you want, you can tap on it and it’ll show you an exclusive footprint meter for them. Walk around and if the footprints are disappearing then you’re getting closer. For pokemon further down the list if they move up the list but still have three footprints they’re getting closer. It can be frustrating because it’s so vague and you might end up walking in the opposite direction for a few hundred feet. Just make sure to be patient and don’t give up on certain directions too easily. It usually takes a couple blocks to affect a pokemon distance meter.
If you want a certain pokemon that aren’t in your neighborhood you’ll just have to do some thinking. Certain pokemon will inherently be near their natural habitat. Water pokemon will usually be around water, even small ponds if it shows up on your map. Certain pokemon like Ghastly and Clefairy will come out more often when it’s night. Of course pokemon don’t always appear where they’re supposed to so the best advice is to just go and visit different places yourself and you might just find it, or ask other trainers where they’ve seen the pokemon you want in your city.
When you start the game you’ll also have incense in your bag. Using that will up the encounter rate of pokemon in your immediate vicinity for a short time. You can either buy them with real money or get them as you level up. You also have lure modules. Those can only be used with pokestops (blue icons on the map you walk to) and accomplish the same thing with the added benefit that other trainers can benefit too.
Pro Tip: You will occasionally see tufts of leaves or grass on the map, that is rustling grass. Pokemon will appear more frequently around those areas.
LEVELING AND EVOLVING:
First off, you’ll notice at the bottom left hand corner of your screen, an icon of you has a number under it. That is your trainer level NOT your pokemon level. In this game they are two different things and the trainer level determines your pokemon level. Your trainer level determines how strong the pokemon you find in the wild are, the maximum CP limit of your current pokemon, and as you level yourself up you’ll get some really cool items and unlock more advanced items like great and ultra balls. You level yourself up by catching and evolving pokemon as well as visiting pokestops.
Pokemon power up and evolve using two things, stardust and candy. Stardust is gained each time you catch any pokemon. Stardust is universal and will work on any pokemon so it’s in your best interest to catch as many pokemon as possible even if you already have it or it’s a low level. Candy is more specific and can only be used on the pokemon of the same name and it’s evolved forms. You gain that through catching any pokemon on the same evolutionary line. So Squirtle, Wartortle, and Blastoise will all yield and use Squirtle candy. The candy is named after the base form or lowest/first form so for Charizard: Charmander, for Raichu: Pikachu, for Dragonite: Dratini, and so on.
You’ll need a lot of specific candy to evolve a pokemon, which will range usually between 12 to 50 candies. There are certain exceptions like Magikarp which will require 400 candies to evolve. All that means is you have to catch or hatch a lot of the same pokemon to make it stronger or evolve it. You can also get one candy for every pokemon you transfer. Transferring a pokemon is the same thing as releasing it. You transfer it back to the professor but you can never get it back so be careful with this function.
To level a pokemon you need both candy and stardust. Using both will increase your pokemon’s HP (hit points) which determines how tough they are and their CP (combat power) which determines their strength. CP basically replaces the traditional levels you’ll find in previous games. As stated previously the pokemon’s CP limit depends on your trainer level. If you’ve maxed out your pokemon then you’ll have to level yourself up before you can level your pokemon up. The creators have not specifically stated a trainer limit or a CP limit and users have not reported a limit yet either. So far pokemon can have CPs well past 1000.
HOW TO GET POKEBALLS AND ITEMS:
You might not see an option to get more pokeballs except spend actual money but you get pokeballs either by leveling up your trainer level and getting a mass of them or going to pokestops. Pokestops are the blue diamond shaped icons on your map. They’re usually points of interest. Once you get physically close enough to them they’ll turn into a blue pokeball symbol. You tap on it and spin the picture and get items. When you’re starting off it’ll just be pokeballs. As you level yourself up you get things like potions, revives, and pokemon eggs. You can also tell if a pokestop has a lure module active if you see pink petals fall around a pokestop. That means the encounter rate for pokemon around that pokestop will be much higher than usual.
EGGS:
Eggs in Pokemon GO function similarly to eggs in the video games and can be found randomly at pokestops. You walk around to make them hatch, the amount you walk is indicated under the egg in the egg menu next to your captured pokemon menu. After you put your egg in an incubator your distance will be registered for that egg. You get one incubator when you start the game and this is a special infinite incubator that won’t break. Other incubators you get either through leveling up or buying them with real money. Those incubators will break after 3 uses and will disappear. The distance required to hatch an egg determines the rarity of the pokemon. They’ll usually come in 2KM 5KM or 10KM distances and the longer you have to walk the better the pokemon is, usually.
Pro tip: The game does not register steps, it registers actual distance covered so you’ll have to physically move your phone. Pokemon GO does a good job of making sure you don’t cheat either. If you go too fast then the app stops registering distance, so driving in your car doesn’t work. Some people have reported that taking a bus is slow enough to fool the game sometimes so the assumption is the speed limit is roughly around 20 mph. That means biking seems to be the best option.
GYMS:
Gyms are the big towering icons on the map. They’ll usually have an icon of the top pokemon stationed there. You’ll want to have a pokemon stationed there because for every 21 hours your pokemon remains undefeated you get stardust and pokecoins which is the premium currency that uses real money.
When you’re trainer level 5 you can start participating in gym battles. When you first tap on a gym after level 5 you are prompted to choose one of three teams. Those teams have no bearing on your personal pokemon journey just your gym affiliation so choose whichever you like. When a gym is grey then it’s neutral. That means you can move right in and station a pokemon there. You’ll want it to be your strongest so it makes it difficult for others to knock you off increasing your chances at the reward. Keep in mind that if you station your pokemon at a gym you cannot use it to battle another gym or station it anywhere else until someone beats you and kicks you out of the gym.
If your team already controls a gym, check the color, then you can station a pokemon there unless it’s full. Your stationed pokemon will automatically move to the most appropriate slot based on its CP and if your pokemon is the strongest then it’ll take the crown spot.
If the gym is controlled by another team you’ll have to battle your way to get it to neutral. I recommend you fight with other players which makes taking over a gym much easier. You have to battle through all the pokemon there and each time you defeat them all the reputation of the gym drops a little. You have to beat them multiple times to make the gym neutral.
Actual battle is not like the video games. Your pokemon will have two attacks. The first is the typical attack that you can launch just by tapping on the screen. The second attack is a more powerful one that requires you to build up some energy first. You build up energy either by attacking with the weaker attack or dodging which you can do by swiping left or right during a battle. When you have enough energy you can hold down on your screen until your pokemon unleashes its special move. Depending on the type of attack and how powerful it is the time you hold your finger down varies.
MOST IMPORTANT:
Remember to be safe. The loading screen reminds us to be mindful of our surroundings. There have already been reports that people have been injured because they weren’t looking where they were going. People expect it’s only a matter of time before we see the first Pokemon GO fatality. Also remember to play with friends, other reports have people robbing Pokemon GO players at popular pokestops.


Latest Comments